

THE REELHIVE FIELD GUIDE
Real estate video editing, explained
From selecting the first shot to exporting the final frame, learn what makes a useful listing video—and when you can skip the editing timeline entirely
Better listing stories start with the photos you already have
01 / Video editing guide
What is real estate video editing
Real estate video editing turns property footage or listing photos into a coherent video through shot selection, sequencing, motion, transitions, music, property details, and branding. The goal is not to add as many effects as possible. It is to help viewers understand the property, notice its strongest features, and know what to do next
Traditional editing starts with recorded footage and gives you detailed control over every cut. Photo-based workflows with ReelHive’s real estate video maker start with still images and generate motion before assembling a finished video. These are different production methods: an AI-generated sequence should not be presented as a continuous filmed walkthrough or proof of the floor plan
Three ways to get to the final cut
Choose based on your source material, creative requirements, and available time—not just the number of effects in an editor
| Approach | Best fit | What you need to consider |
|---|---|---|
| Edit it yourself | Recorded tours, agent interviews, and projects that need frame-by-frame control | A desktop editor such as Premiere Pro, DaVinci Resolve, or Final Cut Pro can support a detailed workflow. You still need to select shots, learn the tools, manage audio, and export each version. Check current platform support and licensing before choosing software |
| Hire an editor | Custom storytelling, mixed camera footage, detailed sound work, or recurring production | Send an organized brief with footage, reference style, brand assets, length, and delivery formats. Confirm revision limits and turnaround in writing. A low starting quote may exclude extra versions or complex graphics |
| Create from photos with AI | Agents and photographers who already have listing photos and want a short marketing video | A focused tool such as ReelHive creates motion and assembles the video for you. You select the photo order, style, format, and optional listing details. It is not a replacement for interviews, precise manual edits, or an on-site camera shoot |
Which real estate video editing software fits your job
Start with your material: recorded footage needs an editor; listing photos can use a photo-to-video workflow. The fits below are our editorial recommendations, based on the linked official feature descriptions—not a hands-on software benchmark
| Tool and official source | When to consider it | What to plan for |
|---|---|---|
| Adobe Premiere | Filmed property tours or agent interviews that need precise cuts, dialogue work, and titles | A manual timeline workflow with editing, color, and audio tools; allow time for editing and check the subscription terms before buying |
| DaVinci Resolve | Projects where editing, color correction, and audio finishing belong in one application | Combines edit, color, Fusion, and Fairlight pages; a free version is available, but check feature limits and hardware requirements for your footage |
| Final Cut Pro for Mac | Mac-based editors who prefer arranging shots with a Magnetic Timeline | Connected clips keep titles and supporting material associated with the main storyline; confirm your Mac meets the current requirements |
| ReelHive | Short listing highlights when your starting material is a set of property photos | Choose order, style, ratio, and music without a manual timeline; raw footage uploads and frame-by-frame editing are not supported |
Official feature sources checked September 8, 2026. Follow the tool-name links for current specifications and licensing; these tools are not interchangeable
A practical editing workflow
Whether you work in an editing application or brief an external editor, these six decisions make the result easier to watch. If you are working with photos, upload and arrange your listing photos first, then use the steps below to check your setup
- 01
Start with the destination
Decide whether the video is a short social introduction, a website listing highlight, or a longer filmed tour. Choose the audience, aspect ratio, and call to action before editing. A vertical teaser and a horizontal presentation may need different framing, not simply the same crop
- 02
Select and order the images
Open with a strong exterior or the most distinctive living space. Move through shared areas, the kitchen, bedrooms, and outdoor amenities in an understandable order. Remove near-duplicate angles. Do not imply that two rooms connect just because their images sit next to each other
- 03
Keep movement and transitions restrained
With filmed footage, remove unusable or shaky sections before adding effects. Use consistent pacing and simple cuts or transitions. With AI-generated motion, inspect windows, door frames, furniture edges, and room geometry for distortions before sharing the final video
- 04
Make the property details readable
Use concise text for factual features rather than long paragraphs. Check the address and any supplied details against the listing. Keep text away from screen edges and social app overlays, and preview on a phone to catch small type or awkward cropping
- 05
Balance music and branding
Choose music you have permission to use for your intended channel. Keep the soundtrack supportive rather than distracting. Add a discreet logo when appropriate, and check whether the destination requires an unbranded version before producing it
- 06
Review the export, not just the preview
Watch the downloaded file from start to finish. Look for duplicated shots, clipped text, abrupt audio endings, or inaccurate visual changes. Check the destination’s current file and branding requirements. Save the finished file and source material so future corrections are manageable
Build a story, not a stack of photos
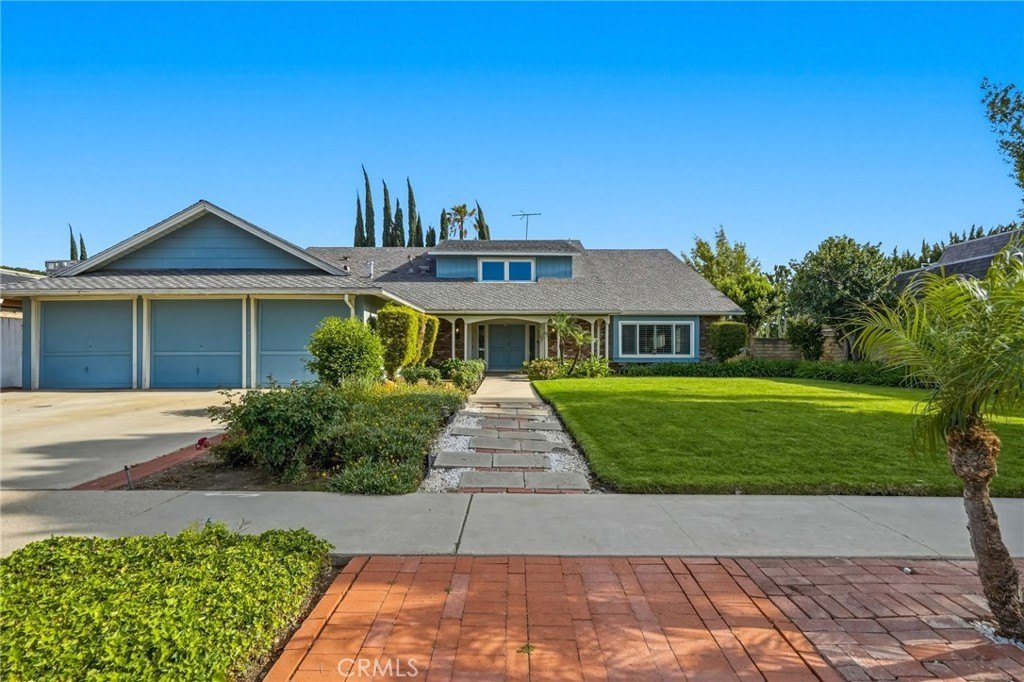
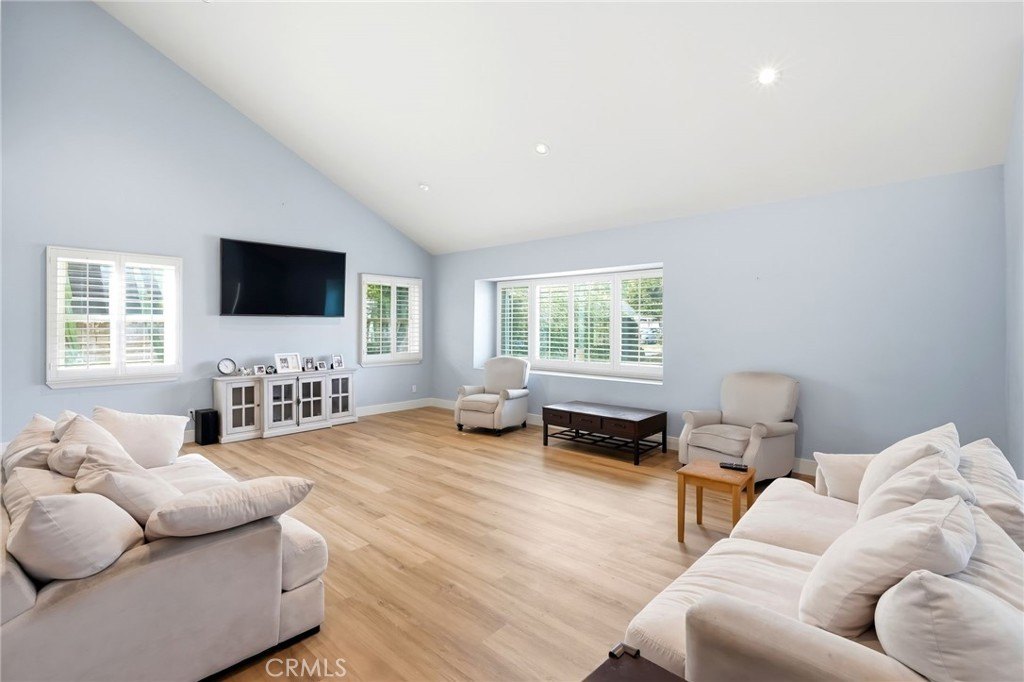
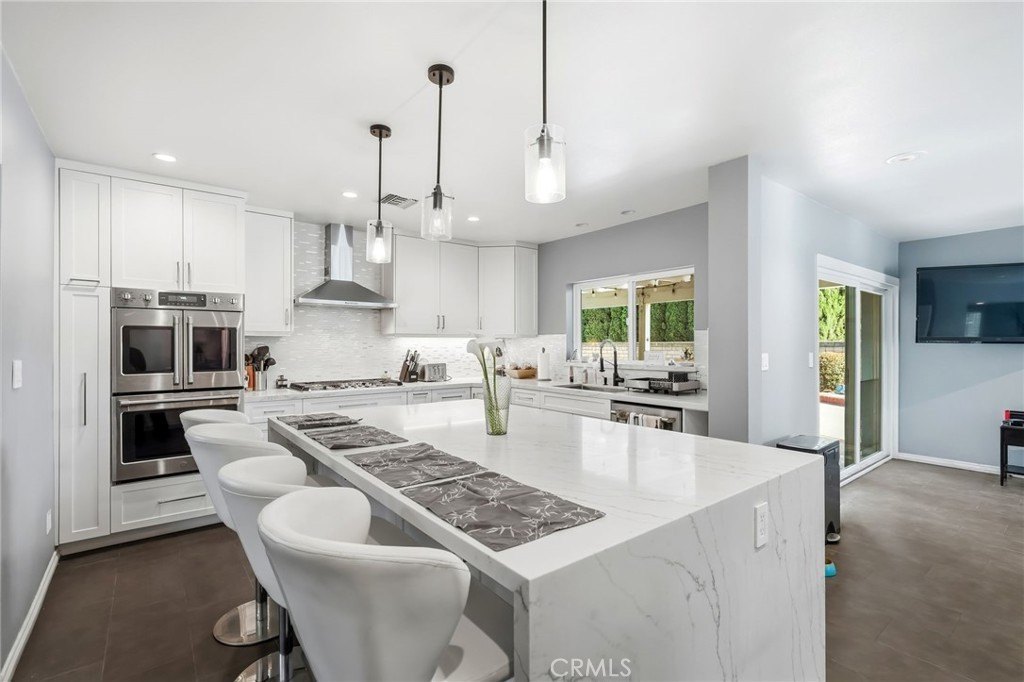
A simple exterior → living space → kitchen sequence establishes context before moving into details. These are sample source photos, not a claim that every generated frame will reproduce them exactly
See what a finished listing video looks like
This existing ReelHive example combines multiple property scenes into a finished landscape video
What to check while watching
- Follow the scene order: does each change help you understand another part of the property, without implying an unverified connection between rooms?
- Pause on windows, door frames, and furniture edges to look for bent lines or changing geometry. Compare with the actual source photos when reviewing your own output
- Watch the opening and ending, then view on a phone: check framing, readable details, music level, and whether the ending feels abrupt
Try a five-photo listing brief
This is a suggested practice setup, not the production record for the video above. Use your own authorized photos; AI output varies, so the same settings do not guarantee the same result. When your images are ready, create a video with your own listing photos and apply these suggestions to your property
- Prepare five photos — Choose an exterior, living room, kitchen, bedroom, and outdoor amenity, in that order. Remove duplicates and do not invent connections between spaces
- Configure on the homepage — Choose Modern and 16:9 for a horizontal listing highlight, then select an available background-music track. Leave optional property details and branding empty for a first trial
- Generate deliberately — Sign in if needed, review the settings, and explicitly confirm generation. One complete generation reserves one video allowance; this five-photo trial is not a promise of a 60-second output
- Record and inspect — Keep the photo filenames, order, style, ratio, music name, and actual output duration with your project notes. Review the downloaded result against each source image before publishing; do not label generated movement as a filmed walkthrough
Pick the frame before you edit
A wider view
A practical choice for horizontal website embeds, YouTube, and listing presentations. Keep important room features visible and verify your property portal’s own upload requirements
Made for the vertical feed
A natural fit for Reels, Stories, TikTok, and Shorts. Preview the crop before generating: a wide room photo may lose important features at the sides. Keep titles clear of platform controls
How much does real estate video editing cost
There is no useful universal price without a scope. Editing existing footage is different from hiring someone to film the property, and a short photo-based highlight is different from a custom narrated tour
For an outside editor, request a quote that specifies raw footage volume, finished length, color and audio work, graphics, number of exports, revisions, and delivery date. For DIY, consider both the software license and your time. For AI tools, compare the cost per finished video, photo limits, watermark rules, and expiration of credits—not just a headline monthly price
ReelHive offers a registration trial, subscriptions, and one-time video packs. Free output includes a ReelHive watermark; paid output supports your project logo and brand color without the platform watermark. Check the current pricing page for exact allowances and billing terms
A concrete ReelHive cost comparison
- One-time video packs — 1 video costs $22; 3 cost $57 ($19 each); 5 cost $89 ($17.80 each). Allowances expire 12 months after payment
- Essential monthly — At $49 per month for 3 videos, using all 3 works out to about $16.33 per video. If you use only 1 that month, the subscription spend per used video is $49
- Essential yearly — The $468 annual payment is equivalent to $39 per month, with 3 videos per month. Using all 36 monthly allowances across the year works out to $13 each—not a $39 month-to-month plan
USD examples checked against ReelHive’s pricing on September 8, 2026, before any applicable tax. These are plan-cost calculations, not custom editing quotes; they exclude filming and your review time. Subscription unit costs assume the stated usage, and allowances are not unlimited. Confirm current billing terms on the pricing page
Compare current ReelHive plans ↗REELHIVE / PHOTO TO VIDEO
Only have photos? Skip the timeline
ReelHive is a focused alternative for creating short listing videos from existing images. Choose your photos and style on the ReelHive homepage, without writing prompts or learning a timeline editor
Upload and arrange
On the homepage, select your listing photos and put them in the order you want viewers to see
Set the look
Choose Luxury, Modern, or Social, then select 16:9 or 9:16 and background music. Add optional property information and eligible branding
Generate and review
Sign in when needed, confirm generation, and review the finished video before downloading. Allow time for processing and a final quality check before your planned publishing date
Real estate video editing questions
What is the best software for real estate video editing
For filmed tours with precise cuts and dialogue, consider Adobe Premiere; for editing, color, and audio in one application, consider DaVinci Resolve; for a Mac Magnetic Timeline workflow, consider Final Cut Pro. If you have listing photos rather than footage, ReelHive is a focused alternative. See the comparison above and check the linked official specifications before choosing
Can I make a property video without filming
Yes. Photo-to-video tools can create motion from still listing images and combine the scenes with music and text. The result is generated marketing content, not a recording of a continuous walk through the property. Review it for accuracy before publishing
How long should a real estate video be
Use the shortest length that explains the property without rushing. A social highlight has a different job from a detailed filmed walkthrough. ReelHive’s free trial videos are about 15–18 seconds, while paid listing videos can be up to approximately 60 seconds, depending on the images and plan
Can I upload raw video footage to ReelHive
ReelHive currently creates videos from listing photos, and we will gradually expand its video creation and editing features. If you would like to upload raw footage or work with drone clips or interviews, email support@reelhive.app with your use case to help us prioritize future features
Can I use the result on an MLS
Check the rules of your particular MLS or property portal, including branding, music, AI disclosure, file formats, and hosting. Choosing a horizontal format alone does not make a video compliant. ReelHive does not guarantee acceptance by every MLS
Do I need to know how to edit videos
Not for the ReelHive photo-to-video workflow. You choose the order, style, aspect ratio, and music on the homepage. You should still review the finished result for factual accuracy, visual artifacts, readable text, and suitable framing
Your photos. Your next listing video
Put this workflow to use for your next property and create a listing video from your photos
Create a video from photos